Installation
This guide will help you install and configure the SWAG SDK for Unity.
INFO
If you're upgrading to the latest version of the SDK, please remove the existing WebGL Template and SWAG SDK package from your project first to avoid conflicts.
Download the SDK
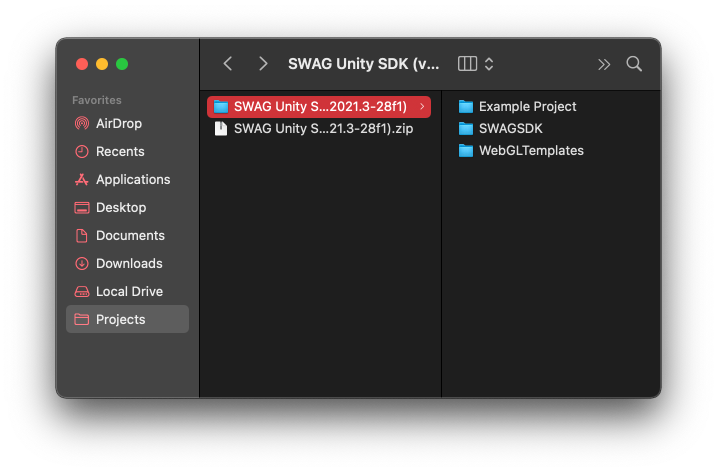
Download the latest version of the SDK and unzip the folder somewhere outside of your project. The archive should contain three folders: WebGLTemplates, SWAGSDK, and Example Project.
INFO
If you're starting a new project from scratch using the Example Project you can skip to here.
Install the WebGL Template
- Copy the
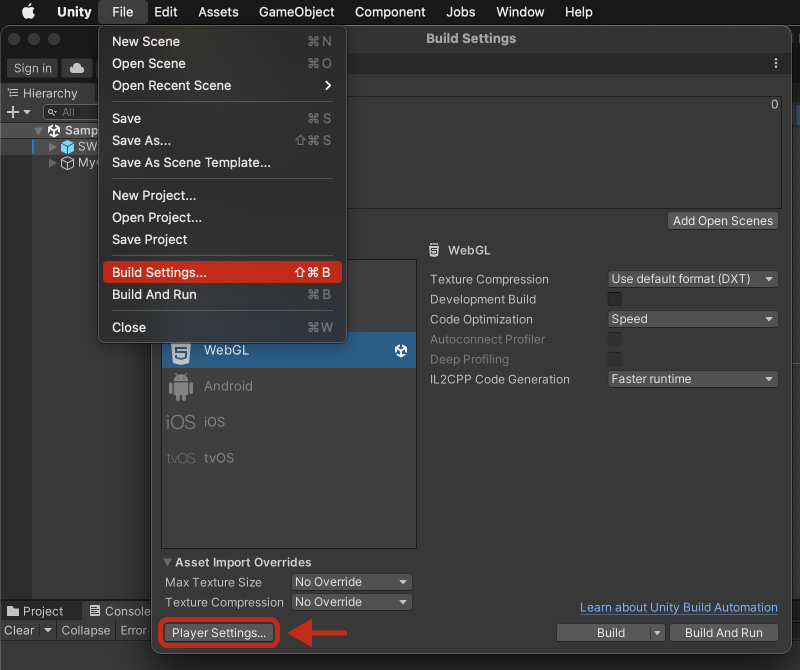
WebGLTemplatesfolder into your project'sAssetsfolder. - Open your projects Build Settings (File -> Build Settings). With the WebGL platform selected, open the Player Settings dialog.
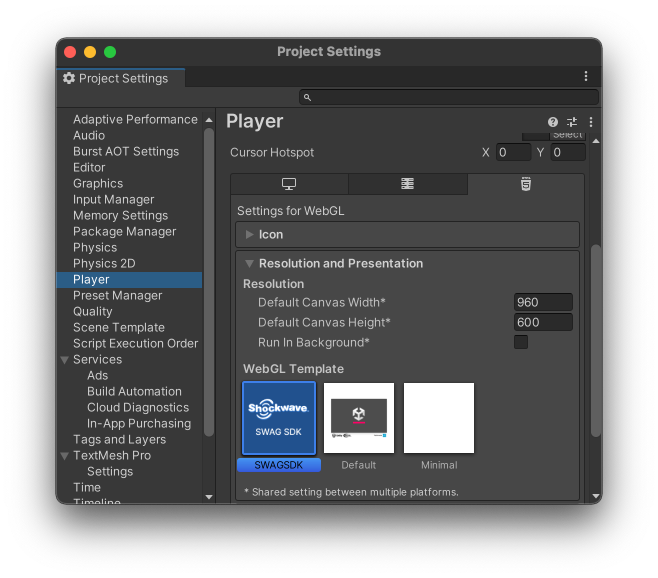
- Under the Settings for WebGL panel, select the SWAGSDK template.
INFO
You can learn more about WebGL Templates, what they are, and how they work, here.
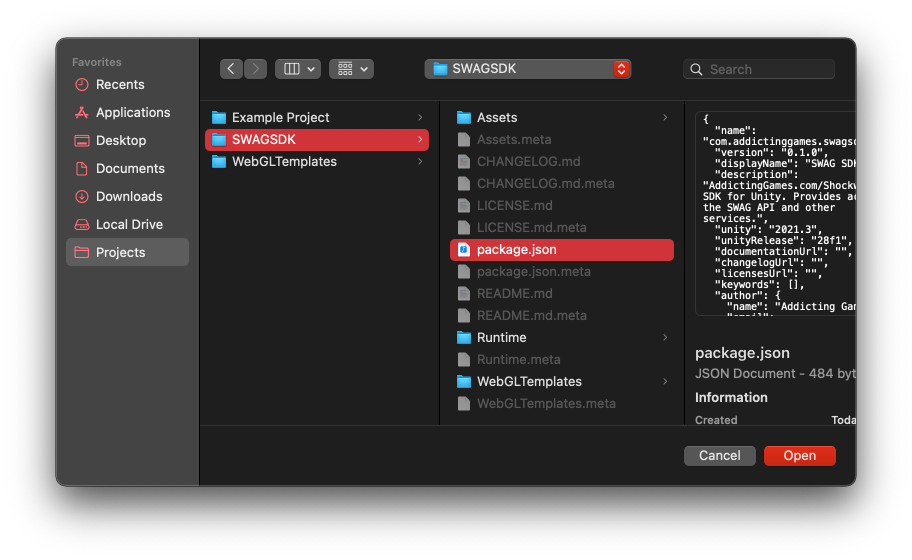
Install the SWAG package
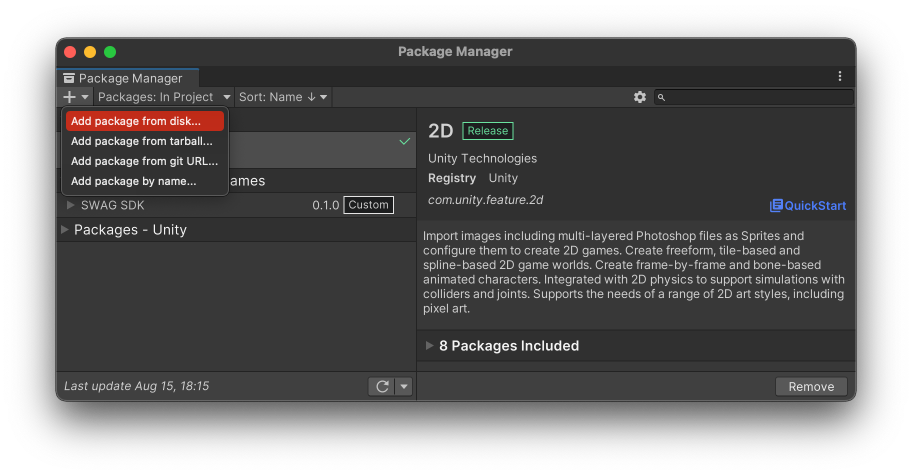
- Open the Package Manager (Window -> Package Manager) and from the + icon dropdown, choose to Add package from disk.
- Navigate to the
SWAGSDKfolder inside the folder you unzipped. - Select and open
package.jsonfrom inside theSWAGSDKfolder.
INFO
You can learn more about installing local packages here.
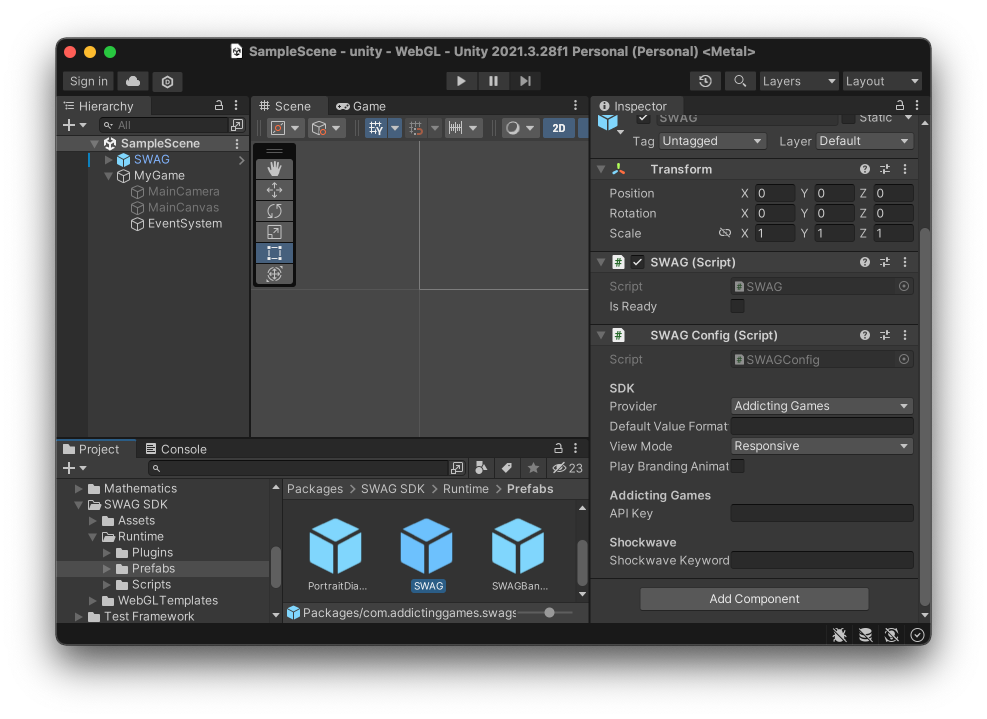
Add the SWAG prefab to your scene
- In your
Packagesfolder, navigate toSWAG SDK/Runtime/Prefabs. - Drop the
SWAGprefab into your scene.
INFO
- Please make sure you have an EventSystem somewhere in your scene, as the prefab does not provide one. (GameObject -> UI -> Event System)
- TMP Essentials is required. Unity should automatically prompt you to install the resources needed when you run your game.
Configuring SWAG
Once the SWAG prefab is added to your scene, click on the game object to configure the SWAG component in the editor panel.
INFO
You can view a full list of the configuration options available here
For Shockwave.com*
If your game is for Shockwave.com:
- Choose the
Shockwaveprovider under the SDK header. - Enter your game's Shockwave Keyword under the Shockwave header.
* Please note that at this time, the Shockwave provider is unsupported, but will be available in a future update.
Basic Usage
The SDK automatically handles initialization and authentication when the scene is loaded. In order to use many of the features of the SDK, you will need to first ensure that the SDK has finished loading and is in a ready state.
There are two ways you can accomplish this:
- By checking the
isReadypublic field of theSWAGinstance:
using UnityEngine;
using UnityEngine.EventSystems;
using Shockwave;

public class OpenDialogButton : MonoBehaviour, IPointerClickHandler
{
    public void OnPointerClick (PointerEventData eventData)
    {
        var swag = SWAG.Instance;
        if (!swag.isReady) return;

        swag.Scores.ShowDialog(
          () => { Debug.Log("Dialog has closed"); }
        );
    }
}- By using the
OnReadycallback:
using UnityEngine;
using Shockwave;

public class MyGameController : MonoBehaviour
{
    void Start ()
    {
        var swag = SWAG.Instance;

        swag.OnReady(() => {
            // Initialize the rest of your game
        });
    }
}
Building Your Game
Once you've installed the SDK and verified that it works in Play Mode, you're ready to build your game.
SWAG API calls are secured via CORS and as such will only work properly when coming from local.shockwave.com or local.shockwave.com domains on port 8888.
In order to test SWAG API integration in your built game locally, you will need to add these domains to your HOSTS file and run your game using an external web server. Each entry needs to be on its own line.
Entries to add to your hosts file
127.0.0.1 local.shockwave.comINFO
You can find the HOSTS file at the following locations. You will need to be an administrator to edit the HOSTS file.
Windows: C:\Windows\System32\Drivers\etc\hosts
MacOS & Linux: /etc/hosts
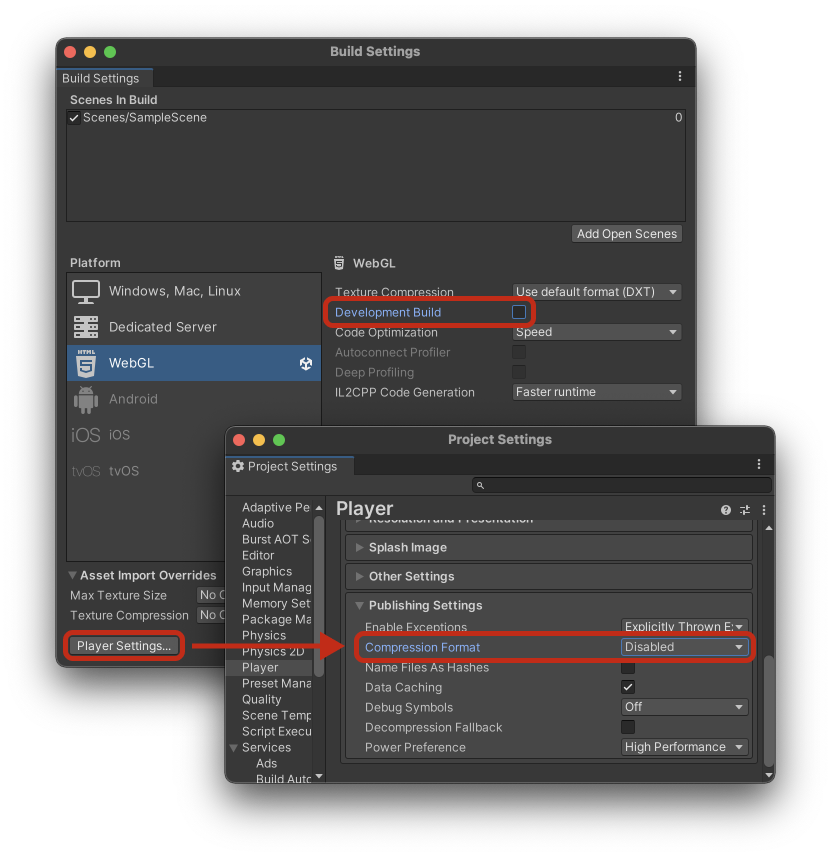
Now that you've added the HOSTS entries, you can build your game. From the Build Settings menu, making sure you have the WebGL platform selected, click the Build button and choose a folder.
Next, run an HTTP server in the folder where you built your game. The root of your HTTP server should be the the folder that contains your game's index.html file.
If you have NodeJS installed, you can do this in one command using the http-server node package:
Run a local web server
npx http-server ./ -p 8888Submitting Your Game
Before submitting your game, please ensure that compression is disabled, and that you are not building in development mode.
Next Steps
Now that you've installed the SDK you're ready to start using it.
- For a quick overview of the available features (with examples), check out our Usage & Examples guide.
- For a more comprehensive look at the features available, take a look at the Script Reference guide for the SWAG C# class.